Tuesday, June 11, 2013

Vanilla Buttercream Frosting

Frosting is one of my favorite things to make. I absolutely love watching butter, sugar, and whipping cream come together and get all fluffy and beautiful! Really, those three ingredients can make anything taste amazing! Yesterday, I posted a recipe for my favorite white cake that tastes almost exactly like the cake we had at our wedding. Today, I'm sharing the recipe for the vanilla buttercream frosting I always make with this cake. When I was on the hunt for a copycat cake recipe, I found this frosting recipe on the same blog. In her description, she said that it reminded her of the frosting at Olexa's in Mountain Brook. That was all it took for me to try it. If you're in Birmingham and you've been to Olexa's, you understand what I'm talking about. Oh my goodness, their cake! They serve it warm and it is SO delicious! And the frosting...it's perfect. Well, this frosting is pretty darn close.


Make the cake, make the frosting, and pray for some self-control.

Vanilla Buttercream Frosting
1 cup butter, room temperature
6 cups powdered sugar
1/2 cup whipping cream
2 tsp pure vanilla extract

1/4 tsp almond extract (optional)

In the bowl of an electric mixer fitted with the paddle attachment, cream butter until smooth and creamy, 2 to 3 minutes. With mixer on low speed, add 6 cups sugar, whipping cream, and vanilla; mix until light and fluffy. If necessary, gradually add more powdered sugar to reach desired consistency.

Source: Plain Chicken


Monday, June 10, 2013

White Almond Sour Cream Cake

Since our anniversary is this week, I'm doing some posts that are wedding related! :)

One of the most fun things about planning our wedding was cake tasting. We *may* have been especially indecisive about this particular decision just so we could taste more cakes. Some of the bakers only gave us a teeny, tiny piece to taste...and then we found "the one." This particular baker just made wedding cakes as a hobby because she loved it. When we went to meet with her, she sent us away with a dozen full-size cupcakes. Definitely made a good impression on this cake lover, that's for sure! I remember taking them straight to my sister's house and she, my brother-in-law, my niece, Daniel, and I all stood around the kitchen counter testing them out. They were amazing! We realized a little too late that we didn't save any for my parents. Oops. I had to order another dozen so they could taste them, too. I wasn't mad about it. ;)


Anyway, when we placed our order with this lady, she told us to go ahead and eat our top tier whenever we wanted after the honeymoon because she would just bake us another mini cake for our one year anniversary. We ate our top tier after one month and were already looking forward to getting another cake for our anniversary. We did and it was just like we remembered it.

When our two year anniversary was coming up, I e-mailed her to see if I could order another mini cake only to find out that she wasn't making cakes anymore. I was devastated...okay, maybe that's a little strong, but I was really sad about it. It became my mission to recreate this cake for our anniversary. It was serious business.


I scoured the internet, Pinterest, and some of my favorite blogs and kept seeing the same recipe come up time after time and it had great reviews everywhere I looked. I decided to give it a try and it. was. awesome. It wasn't an exact match, but it was so incredibly close. Definitely a worthy replacement.

I'm pretty sure that I started a tradition last year and will be making this cake every year for our anniversary. It just makes us happy and brings back so many memories of that wonderful day. Hopefully, as I continue this tradition over the years, my cake decorating skills will improve. :) Definitely not as pretty as the pictures above, but it sure tasted amazing.

Check out this post for an amazing buttercream frosting recipe!!! I could eat it with a spoon!


White Almond Sour Cream Cake
Makes one three-layer cake or 36 cupcakes
1 box white cake mix
1 cup flour
1 cup sugar
3/4 tsp salt
1 1/3 cups water
1/8 cup vegetable oil
1 tsp vanilla extract
1 tsp almond extract (This is optional, it's delicious with or without the almond!)
1 cup sour cream
4 large egg whites


Preheat oven to 325.

Place all dry ingredients in a large mixing bowl and stir together with a whisk to get rid of any lumps. Add remaining ingredients and beat on medium speed for 2 minutes until batter is smooth and fluffy. Pour into three greased and floured cake pans or cupcake tins. Fill about halfway full.

Bake for 28-31 minutes for cake or 18-21 minutes for cupcakes.


Saturday, June 8, 2013

Favorite FREE Love Printables


Our three year anniversary is coming up in just a few days, so in honor of this event celebrating LOVE :), I thought I'd post a round up of some beautiful, free love printables from all around the web. I've been wanting to do a gallery wall in our house for, oh, I don't know...three years, so I'm hoping some of these will get me motivated to start! :) I hope you find something you love!


This "I Love Us" printable from eighteen25 is so simple and sweet.
They have several different colors to choose from, too.


"Love Abides Here" from 52 mantels.


This one is so true. Find it at It Works for Bobbi.


"I Love You" from Landee See, Landee Do.


Another simple one, but so meaningful. You can get this printable at life {illustrated}.


A portion of 1 Corinthians 13 from Inspirations by D. They have different styles and colors for this one, too.


I love what this one says and I think the design is just beautiful! This one is from Whit Speaks.


"All You Need is Love" from Cupcake Diaries. Love the chalkboard background.


Find "You + Me" at Worthy of the Prize. They have some other cute chalkboard printables, too.


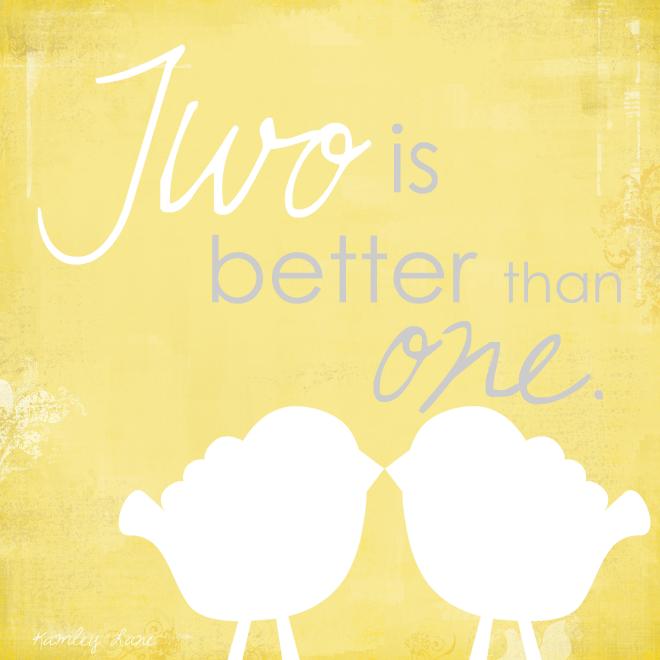
Such a sweet picture. This one is from Kamley Lane.


This is one that I've already printed and framed. We keep it in our kitchen and write notes back and forth to each other. You can print this one in several different colors at Life {Sweet} Life.

I have several fun posts coming up in the next few days, so stay tuned! :)


Thursday, June 6, 2013

A Day at the Golf Course

Y'all, we seriously had such a fun day today! Yesterday afternoon, Daniel sent me a text that just said, "Don't make any plans for tomorrow." I was intrigued and texted him back asking if he was going to fill me in. :) He called me a little bit later and told me that he got tickets and hospitality tent wristbands to go to the Regions Tradition PGA Champions Tour. Daniel works at Regions and we've wanted to go every year, but have never been able to make it. The Regions Tradition comes to Birmingham each year and is a huge event that raises a ton of money for charity, mainly Children's of Alabama. It's held at a beautiful golf course called Shoal Creek. I mean, I was in awe the whole time. This clubhouse was gorgeous! I want my yard to look like that!


Having the wristbands meant we got to hang out in the air conditioned Regions hospitality tent which was located on the 18th green. It was so fancy in there! They had all the free food, desserts, snacks, and drinks you could possibly want! It. was. awesome. {Does anyone else have the urge to eat as much as you possibly can when it's free and there's lots of it? Just me? I didn't think so. ;)} At one point, I saw someone with an ice cream bar and I was on the hunt. I must find this free ice cream! They had an entire freezer full of ice cream bars, ice cream sandwiches, ice cream cones, and...


Dibs!! I haven't had these in forever! They're the perfect little poppable bite of chocolate covered ice cream nuggets with just a little crunch. So yummy. They were giving away entire little tubs of them. Happy girl, right here. :)

They also had the famous Regions bike from the commercials on display...a giant one! Daniel said they have it on display in his office building sometimes. They had a sign by the bike that said, "Do Not Climb," and at first I thought, "Who would try to climb this thing?" Then my teacher brain kicked in and I thought of about 15 kids who would try to climb it!


I've never been much of a golf fan, but I could definitely make a habit of enjoying these gorgeous views {and the food tent!}.


I'm so thankful I got to spend this day with my sweetheart! :)


Wednesday, June 5, 2013

Checking Things Off the To Do List AND a Free Printable!

I have been busy over the last few days! It feels so good to get some stuff done that's been bugging me for a while. I use this great app called Any.DO to store my to do list. It has seriously made my life so much easier. Any time I think of something I need to do, I just add it to my list right then and then it can leave my brain. My brain feels pretty cluttered a lot of the time, so the fewer things I have bouncing around in there, the better! The best part is that when you complete a task, you can cross it off! I know I'm probably really weird, but I get a little thrill every time I cross something off. :) I also put things in the list that I do every day, like taking my vitamins. I really was the WORST vitamin taker before I had this app. I tried everything - I put the bottle in my lunch box, kept it on the kitchen counter, kitchen table...nothing worked. Now that I have this app, I just clear everything off before I go to bed so I can't forget! Once I take them, I just move that task to tomorrow on my list. Ok, that was a lot of info about my vitamin taking habits, but really...this app rocks. I love it {if you couldn't tell}.

Here's an example of how cluttered my brain is and how this app has totally helped. About a month before school got out, I was cooking dinner. I keep my recipe book in a cabinet above the microwave. I have about 15 years of recipes in this binder. I'd like to say everything was hole punched and filed behind the correct divider, but that would not be true. Every time I had to get out this recipe binder, I put myself in danger of dropping it on my head and scattering roughly 200 loose recipes all over my kitchen. It was bad. So finally one night, I grabbed my phone and added "organize recipes" to my list. I knew this wouldn't get done until school was out, so I entered it on the first week of my summer vacation. Then I forgot about it until the day it came up. See? It totally reduced my brain clutter!

You'll be happy to know after that whole story that I did in fact get the joy of crossing that task off on my list this past week. I wish I had a before picture so you could see the mess that was my recipe book. Here's where I had everything before. My mom got me this recipe binder when I was about 14 so it's definitely a keeper.


I hole punched all of my loose recipes, organized them by category, and put them behind the correct divider. Oh, sweet organization! But after three years of serious food blog following and Pinterest recipe pinning, I had outgrown this recipe binder. So I took all of my main dish and dessert recipes out and put them in their own separate binder. Now I know what recipes are in each binder and I have room to grow in both of them. Not to mention, making dinner is a lot less hazardous for me now! Of course, I had to make a cute binder cover. It makes me happy!


Well, I thought that I'm probably not the only one with recipe mayhem, so I've included printables for your own recipe binder covers in three different fonts! :) (Fonts also make me happy)! Just click the link below to get yours.


Here's to crossing things off your to do list! :) Happy organizing!


Monday, June 3, 2013

Baked Ravioli - EASY Weeknight Meal!

Linking up today with 4 Little Fergusons for Weekend Potluck Party. :)


Oh, easy weeknight meals with only a few ingredients, how I love you! I tried this baked ravioli a couple of months ago for the first time and we loved it! Not only did it taste really good, it only has 4 ingredients! It's also super fast to assemble. I believe the pin description on Pinterest promised an assembly time of 3 minutes. It wasn't quite so fast for me...but that could be because I had to make sure every centimeter of the ravioli were covered with marinara sauce. Who wants to bite into an unevenly sauced section of baked ravioli? Not me. NOT me. Three minutes or not, the assembly time was still very fast for such a good result.


The original recipe only calls for marinara sauce, frozen ravioli, mozzarella cheese, and parmesan cheese. I made it exactly as written the first time and it was delicious. When I made it the other night, I had half a jar of alfredo sauce and some pesto in the fridge, so I decided to mix them together and add another layer. It was the right thing to do. :) It made it creamier, cheesier, and added another layer of flavor. I'm sure I'll make the original recipe again, but if I've got alfredo sauce and pesto on hand, I'll definitely make it that way!


Baked Pesto Alfredo Ravioli
Makes 6-8 servings
Printer Friendly Version

1 (25 oz.) bag of frozen ravioli
1 (26 oz.) jar of marinara sauce (The better sauce you use, the better it will taste!)
2 cups shredded mozzarella cheese (I used six cheese Italian.)
1/2 (15 oz.) jar of alfredo sauce
3 T. pesto
Parmesan cheese, for sprinkling
Dried parsley, for sprinkling (I just think it makes it prettier!) :)

  1. Heat oven to 400°F. Spray bottom and sides of a 9×13 rectangular baking dish with cooking spray.
  2. Mix the alfredo sauce and pesto together.
  3. Spread 3/4 cup of the pasta sauce in baking dish. Arrange half of the frozen ravioli in a single layer over the sauce; top with half of the remaining pasta sauce, half of the alfredo sauce and pesto, and half of the mozzarella cheese. Repeat layers once: ravioli, remaining pasta sauce, remaining alfredo sauce and pesto, and remaining mozzarella cheese. Sprinkle with Parmesan cheese and dried parsley.
  4. Cover with aluminum foil and bake for 30 minutes. Remove foil; bake uncovered for 10 to 15 minutes longer or until bubbly and hot in the center.* Let stand for 10 minutes before serving.

 *I like to turn the oven on broil for the last 2-3 minutes to make the cheese nice and bubbly and a little bit crispy. Just remember to chant "broiler, broiler, broiler" to yourself while it's in there so you don't forget about it. (Wait? Am I the only one who tends to forget when I put something in to broil and then burn the heck out of it? Surely not...)

Recipe slightly adapted from Tasty Kitchen

Let me know if you try it and what you think!! :)

post signature
Follow on Bloglovin  follow us in feedly

Linking up with Chef In Training.

Saturday, June 1, 2013

Chuck E. Cheese!

I love summer break! I get to do so many things that I can't do during the school year...like have a picnic in the park with my sister and niece. On a Friday. At noon. I love it! Getting to spend more time with my family during the summer is one of my favorite things.

After our picnic in the park, I took our niece, Vanna, home with me for the rest of the afternoon. Daniel and I have been wanting to take her to Chuck E. Cheese for a while and we finally got to go last night. She knew we were going somewhere but didn't know where. After we told her where we were going, Daniel had her convinced that he was going to change into a mouse suit before we left. He told her that Chuck (Chuck E.? Chuck E. Cheese? Mr. Cheese?) really likes it when people do that.


We had SO much fun! I think we had just as much fun as she did. She was so excited that she just ran from one game to another. I think she rode this carousel three times. One time when she rode it, there were already two other kids on it. Well, there's only one spot for a token and the dad of the other two kids just kept walking around the carousel acting like he couldn't find where to put the token until we put one in. We were totally on to your scheme, Mr. I'm Pretending I Can't Find Where to Put the Token. ;)


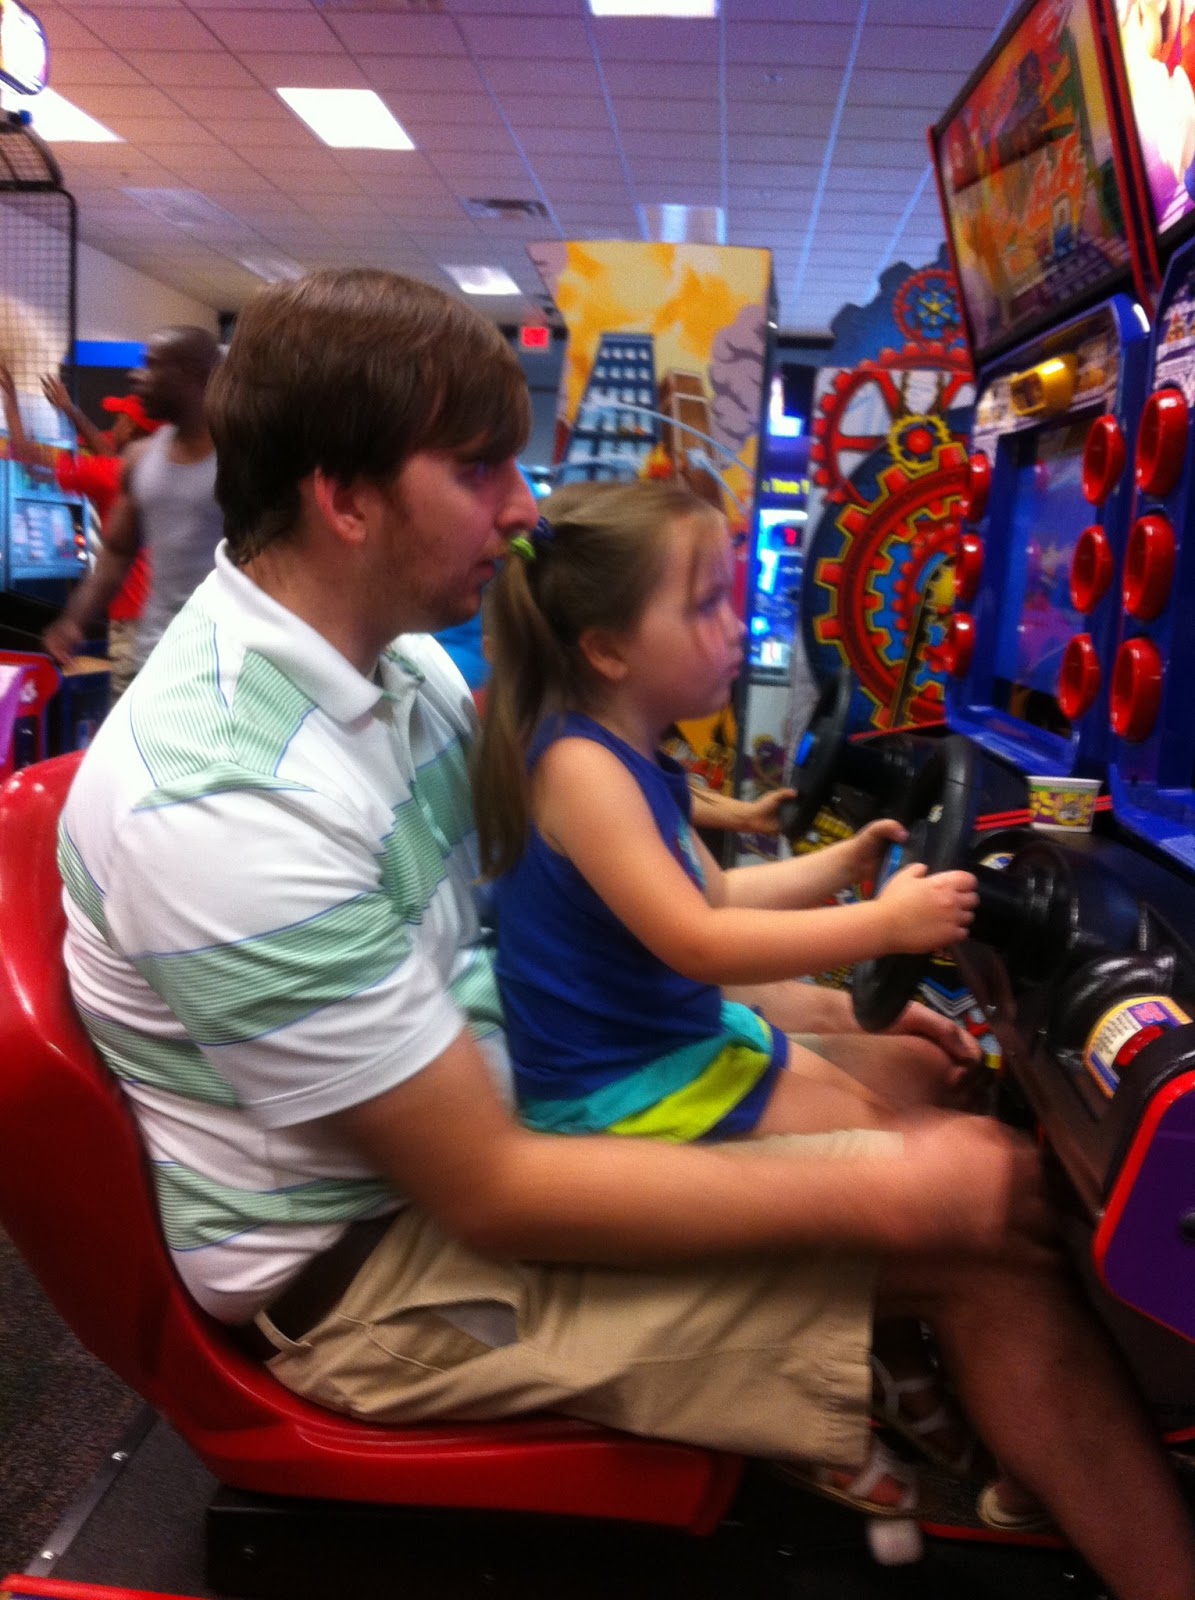
Vanna also loved these racing games. I'm pretty sure Uncle D loved them just as much! ;) She had to sit in his lap since she couldn't reach the pedals. It was precious.


One thing Daniel and I learned at Chuck E. Cheese is that some parents do NOT watch their kids! Vanna was in one of those moving car rides where it kind of jerks you around and you have to wear a seat belt. The ride had already started and a sweet little girl came over and tried to get in while it was moving {no parents in sight!}! We told her that Vanna was almost done and she could ride in just a minute. As soon as Vanna got out, this girl climbed on in. Daniel and I watched as Vanna helped her get in and buckled her seat belt for her. It was the cutest thing! Way to take care of business, Vanna!


Nights like last night are one of the big reasons I wanted to start this blog. I want to remember the big things, the small things, and everything in between.


UA-41563965-1