Showing posts with label weeknight meals. Show all posts

Wednesday, August 7, 2013

Midweek Randoms {August 7, 2013}

Hi there! I hope y'all are having a great week so far. It's my last week of summer break so I'm trying to soak it all in before I go back to teacher mode on Monday. I'm linking up with Megan again this week for Midweek Randoms!


  • One of the apps I talked about in my Money Making Apps post has been updated and I like it so much better! The app is Receipt Hog and you earn coins just by taking pictures of your grocery and drug store receipts. Once you reach 1,000 coins, you can redeem them for $5 in cash {via a PayPal deposit} or an Amazon gift card. My favorite thing about the update is that you now earn a spin at the "Hog Slots" {I know!} for every qualifying receipt. I've earned about 100 extra coins so far at the slots. :)  {My referral link is above. I'd love it if you'd click on it so I can take another trip to the Hog Slots! Ha!}
  • If you have an Earth Fare in your area, you're going to want to check this out. Right now, they have a coupon that will get you 2.5 pounds of grass fed ground beef for $10.00. That's only $4.00 a pound! You just have to sign up with your e-mail address to get the coupon. I had Daniel pick some up yesterday on his way home from work and we had hamburgers for dinner last night. They were SO good! The beef was really lean, too. The coupon expires on August 11, 2013.
  • Two words: Shark Week. I know I am probably going to be in the minority here, but I've never been into it. I've tuned in a couple of times this week, though, because another one of my favorite money making apps, Viggle, is doing 600 point bonuses for some of the shows. Just the few minutes that I've watched have confirmed that I am still NOT a fan. I think this is because I cannot handle gory footage {I can't even watch someone get a shot on TV}. Oh my goodness, the actual aftermath of shark bites that I saw was way too much for me. Just one more reason that I will never ride a jet ski in the ocean again.
  • My mom is hilarious. My parents were recently in Ohio for business and while they were there, they bought a bunch of produce from a farm in my hometown. She made this yummy corn {cut off the cob} for our family cookout a couple of weeks ago and I just raved and raved about it. They went back to Ohio to take care of some business stuff last week and on their way home, she texted me saying she was coming home with lots more corn. We went over to their house the night they got back and my dad told me to check out the fridge. Um, wow, Mom! You weren't kidding! :) I love it!

  • I cooked some rice in my beloved rice cooker yesterday because I'm making my 15 minute fried rice for dinner tonight. This is a meal I always look forward to because it's so quick, easy, and delicious! I usually serve it with these egg rolls, too. SO good!!


I hope y'all have a great rest of the week!! :)

post signature
Follow on Bloglovin  follow us in feedly

Monday, July 8, 2013

Crock Pot Chicken Tacos {Only 3 ingredients!!}

Good Monday morning, everyone! I hope y'all had a great holiday weekend! It was rainy all weekend here so we saw a movie on Saturday afternoon, went to church on Sunday morning, and pretty much relaxed at home the rest of the time. Oh, and we made homemade ice cream this weekend and it was a fabulous success{and dangerously easy}! I can't wait to make another flavor! I plan on sharing the method we used soon! :)

But today, let me tell you, I've got a great recipe to share that has become an absolute staple in my meal planning. I found this recipe a little less than a year ago and have made it so many times since. I knew it would be a winner as soon as I saw it. I love tacos, I love easy recipes, and I love having food ready and waiting on me in the crock pot. I also love it because it's so easy I don't even have to pull out a recipe to make it! Oh, and did I mention that you only need three ingredients?


It's also a fairly budget friendly meal, especially if you can get everything on sale. It makes a large amount of chicken and we usually end up freezing half of it so we have dinner ready for another night. That's another thing I love about this recipe! I love having meals ready to go in the freezer! It really helps on those days we just don't feel like cooking!


Whenever I make a crock pot recipe, I always use these slow cooker liners. It makes clean up so much easier!


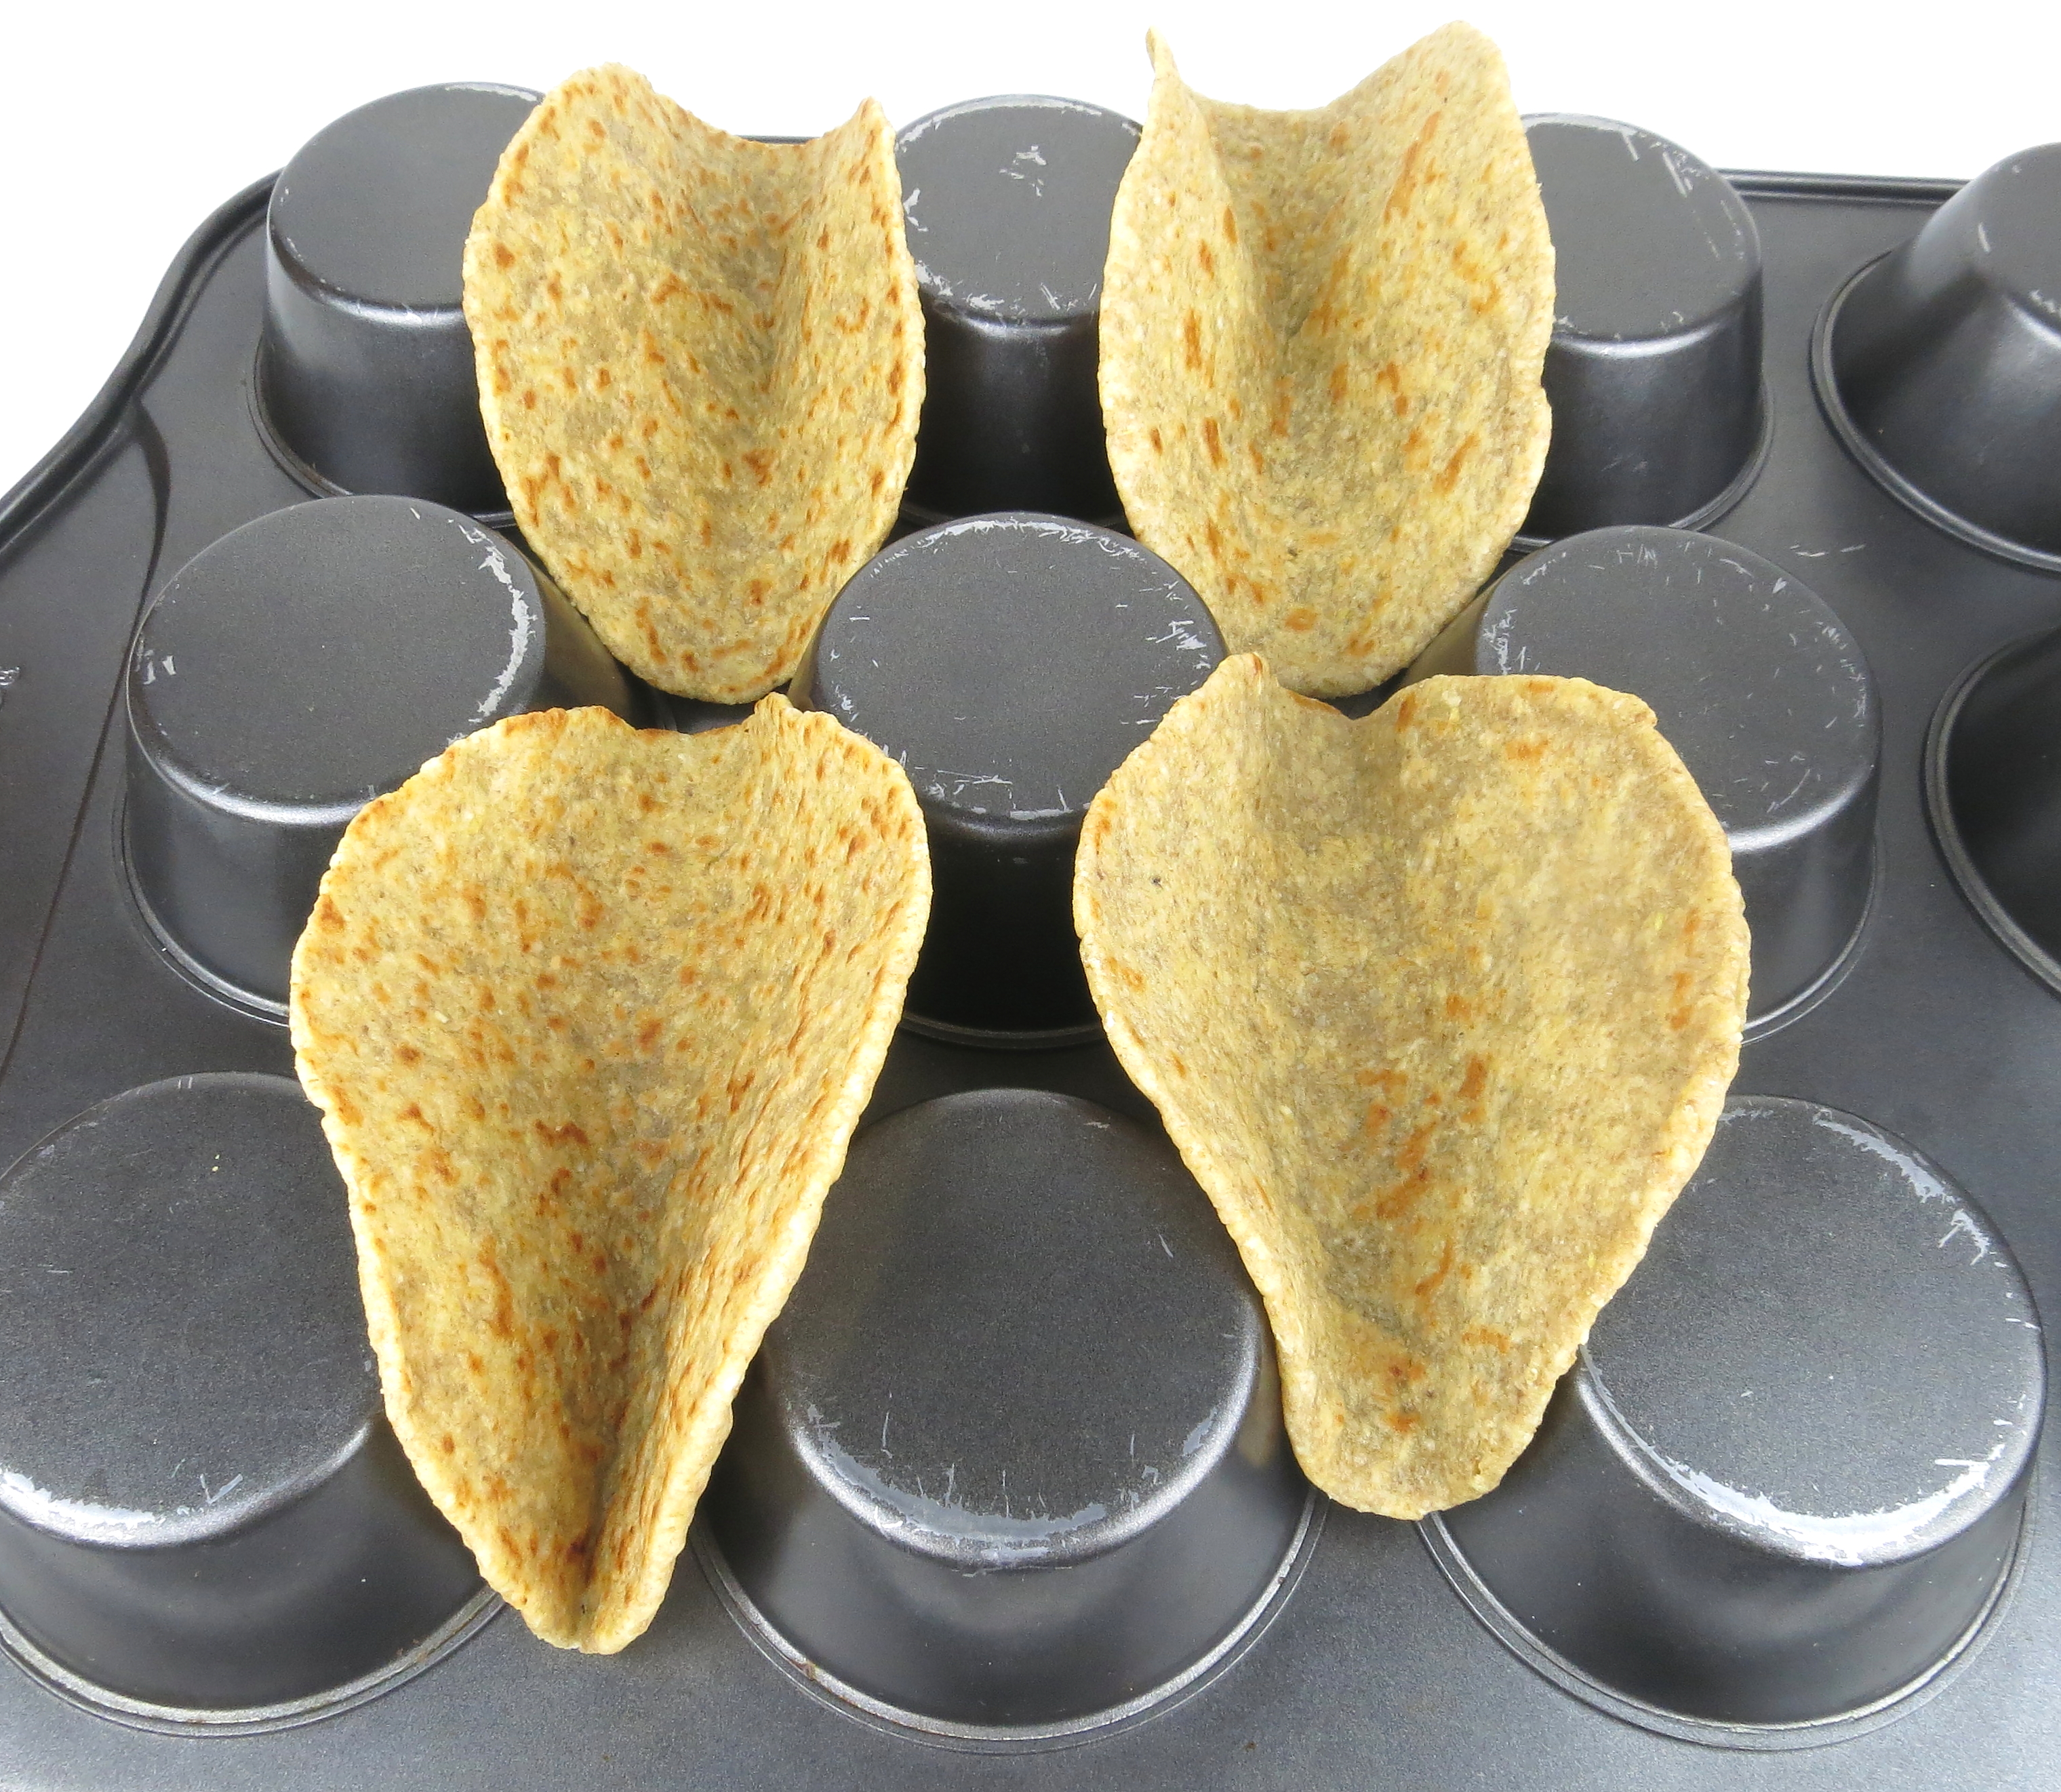
And here's a trick I love for filling the taco shells. It's so quick and easy, you can do several at a time, and then you can just slide the whole muffin tin in the oven when you heat them. Be careful, though. I've had tacos slide out and fall on the oven door before. :(

{Source}
These are our favorite taco shells. Usually, all 12 taco shells are unbroken {don't you hate when you get a box of taco shells and half of them are broken?!}, and they perfectly crisp and crunchy after they're warmed in the oven.


Okay, so have I sold you yet? :) You have to give this one a try. I know you'll love it!!

Crock Pot Chicken Tacos
Printer Friendly Version

1.5-2 pounds boneless skinless chicken breasts
1 packet of taco seasoning
1 (16 oz.) jar of your favorite salsa (My favorite is Tostitos Restaurant Style)


  1. Arrange the chicken breasts so they cover the bottom of the crock pot. Sprinkle them evenly with taco seasoning and then spoon the salsa over the chicken so that the taco seasoning is covered. Do not stir.
  2. Cook on low for 4-5 hours or on high for 2-3 hours.
  3. Shred the chicken using two forks and stir so everything is evenly incorporated. You may want to drain some, but not all, of the juices.
  4. Fill your tacos with chicken and top with cheese. Bake at 425 for 2-3 minutes to warm the taco shells and melt the cheese.
  5. Top with sour cream, salsa, guacamole, green onions, tomatoes, etc... Enjoy!
Source: Iowa Girl Eats

Let me know what you think of these!! Have a great Monday!

Linking up with Anyonita NibblesChef In Training, The Country Cook, Six Sisters' Stuff, and Lamberts Lately.

post signature
Follow on Bloglovin  follow us in feedly

Wednesday, June 19, 2013

Hibachi Style Fried Rice - 15 Minute Meal!

We went through a phase when we were dating and newly married where we went to a Japanese steakhouse almost every week. You know what I mean, the soup, salad, meat, veggies, fried rice, onion volcano, tossing spatulas. We were hooked (on the food, not so much to the onion volcano and spatula show). I don't know if it was the dating/newlywed fog of bliss that made us not think anything much of this habit, but we finally realized, "Okay, we are spending a little too much way too much money on this!" Our favorite thing was easily the fried rice and we were craving it one night like crazy. So, I googled it...and found a really great {and easy!} recipe that we have made tons of times since.

The key to this recipe is using leftover, cold rice. Sometimes I make rice just for this meal and put it in the fridge for a few hours or up to a couple of days, and other times I just make a triple batch if we're eating rice with another meal and put what's left in the fridge. Then, it's ready to go whenever we're ready to make this fried rice.

Oh, and let me tell you about one of my favorite kitchen gadgets. It's my rice cooker.
I bought it after I knew this recipe was a keeper and it makes it so much easier. You just add rice and water (I add a few drops of vegetable oil and about a teaspoon of salt to add a little flavor), turn it on, and you'll get perfect, fluffy rice every single time. I love my rice cooker because it doesn't take up much storage space and it was not very expensive at all! You can totally make this recipe without a rice cooker by just following the directions on the package of rice. It's just a lot easier for me to use the rice cooker because I'm guaranteed perfect rice and I don't have to babysit it at all!

Enough rice cooker love! Let's get to the recipe!

Hibachi Style Fried Rice
Makes 2 servings (Recipe can easily be doubled or tripled)
Printer Friendly Version

2 cups cooked, cold rice
1 T. olive oil
1/2 cup onion, diced
1/2 cup peas and carrots, frozen
1-2 cloves of garlic, minced
1 egg, optional (I usually leave this out and we like it just as well.)
2 T. butter
2 T. soy sauce (more or less to taste)
salt and pepper
  1. Saute onions, peas, and carrots in olive oil over medium high heat until soft. Add salt and pepper to taste. Add the minced garlic and saute until fragrant, about 30 seconds.
  2. Add the butter and cold rice and break apart the chunks of rice.* Add more salt and pepper to taste. Reduce the heat to medium and saute for about five minutes.
  3. Add soy sauce and saute for 1-2 minutes.
Variations: Make it chicken fried rice by dicing up a boneless, skinless chicken breast and sauteing it with a little soy sauce, salt, and pepper. Add the fully cooked chicken after you've sauteed the rice for a few minutes. You could also add a 1/2 cup of shredded cabbage with the onion, peas, and carrots. I don't usually have cabbage, but if I do, I add it and it's really good!

Recipe slightly adapted from Food.com

*I break up the rice with a plastic potato masher. I used to do it with just a metal serving spoon and rice would fly everywhere if I hit it at the wrong angle. Not good. My husband had a stroke of genius one day and suggested using our potato masher. It worked perfectly! No more flying rice!


So, not only have we saved a ton of money by making this rice at home, I've also saved myself the embarrassment of being hit in the face with a chunk of chicken or zucchini when they try to make you catch it in your mouth. {Daniel always gets it. I never catch it. NEVER!}

Let me know if you try this one! :)


I'm linking up with Lamberts Lately and The Country Cook!

Monday, June 3, 2013

Baked Ravioli - EASY Weeknight Meal!

Linking up today with 4 Little Fergusons for Weekend Potluck Party. :)


Oh, easy weeknight meals with only a few ingredients, how I love you! I tried this baked ravioli a couple of months ago for the first time and we loved it! Not only did it taste really good, it only has 4 ingredients! It's also super fast to assemble. I believe the pin description on Pinterest promised an assembly time of 3 minutes. It wasn't quite so fast for me...but that could be because I had to make sure every centimeter of the ravioli were covered with marinara sauce. Who wants to bite into an unevenly sauced section of baked ravioli? Not me. NOT me. Three minutes or not, the assembly time was still very fast for such a good result.


The original recipe only calls for marinara sauce, frozen ravioli, mozzarella cheese, and parmesan cheese. I made it exactly as written the first time and it was delicious. When I made it the other night, I had half a jar of alfredo sauce and some pesto in the fridge, so I decided to mix them together and add another layer. It was the right thing to do. :) It made it creamier, cheesier, and added another layer of flavor. I'm sure I'll make the original recipe again, but if I've got alfredo sauce and pesto on hand, I'll definitely make it that way!


Baked Pesto Alfredo Ravioli
Makes 6-8 servings
Printer Friendly Version

1 (25 oz.) bag of frozen ravioli
1 (26 oz.) jar of marinara sauce (The better sauce you use, the better it will taste!)
2 cups shredded mozzarella cheese (I used six cheese Italian.)
1/2 (15 oz.) jar of alfredo sauce
3 T. pesto
Parmesan cheese, for sprinkling
Dried parsley, for sprinkling (I just think it makes it prettier!) :)

  1. Heat oven to 400°F. Spray bottom and sides of a 9×13 rectangular baking dish with cooking spray.
  2. Mix the alfredo sauce and pesto together.
  3. Spread 3/4 cup of the pasta sauce in baking dish. Arrange half of the frozen ravioli in a single layer over the sauce; top with half of the remaining pasta sauce, half of the alfredo sauce and pesto, and half of the mozzarella cheese. Repeat layers once: ravioli, remaining pasta sauce, remaining alfredo sauce and pesto, and remaining mozzarella cheese. Sprinkle with Parmesan cheese and dried parsley.
  4. Cover with aluminum foil and bake for 30 minutes. Remove foil; bake uncovered for 10 to 15 minutes longer or until bubbly and hot in the center.* Let stand for 10 minutes before serving.

 *I like to turn the oven on broil for the last 2-3 minutes to make the cheese nice and bubbly and a little bit crispy. Just remember to chant "broiler, broiler, broiler" to yourself while it's in there so you don't forget about it. (Wait? Am I the only one who tends to forget when I put something in to broil and then burn the heck out of it? Surely not...)

Recipe slightly adapted from Tasty Kitchen

Let me know if you try it and what you think!! :)

post signature
Follow on Bloglovin  follow us in feedly

Linking up with Chef In Training.
UA-41563965-1