Showing posts with label cooking. Show all posts

Friday, March 7, 2014

Five on Friday {March 7, 2014}

Happy Friday from the longest week ever! I pretty much want to throw confetti in the air and celebrate that it's finally here! I'm linking up with Darci again today for Five on Friday!

THE GOOD LIFE BLOG

One.
*Today* is my last day of work before my maternity leave starts. It feels like the day before summer break!! Best feeling ever. I've said it before, and I'll say it again. Working a full time job while pregnant is no joke, as I know lots of you know. It's been tough and I'm so glad I've reached the end...for now at least. :)

This was my classroom before school started. It definitely is not this neat and tidy anymore!

Two.
Being that it's been my last week of work, I've been getting myself a little something special these last couple of mornings before work. You know, just to help me make it through the day. It's necessary. After all, the days of guilt-free eating are quickly coming to an end. There is this new donut place that's on my way to work and I have found my perfect donut. I used to love the devil's food glazed donut at Krispy Kreme, but they just haven't been very good the last several years. They're just not chocolatey enough anymore...not to mention you never know if they'll have any. Big problems, I know. Anyway, this double chocolate donut is amazing. I want another one right this very minute.


Three.
A friend of my husband sent him this recently and we both laughed and laughed. Soon enough, this will be us. Gone are the days when we can decide we want to go somewhere and leave the house within minutes.


Four.
I really thought I was doing great to have already bought a few headbands and hair clips for Emery...until I saw this picture yesterday on one of the blogs I follow. The baby who these headbands are for hasn't even arrived yet! I'm actually just totally jealous of the organization...it's heavenly.

{via}
Five.
I cooked the other night for what will probably be the last time for a little while. I made this tortelllini soup recipe a few years ago and I remember loving it, but for some reason I never made it again. It's so easy...the hardest part is dicing the onions and mincing the garlic. It's also pretty healthy and is super yummy. It's perfect with a few slices of crusty bread on the side. Or nearly an entire loaf in my case. {See #2 above. Guilt-free eating days = almost over}

Whatever you end up doing this weekend, I hope it's wonderful!! :)

post signature
Follow on Bloglovin  follow us in feedly

Monday, October 14, 2013

Perfect Pumpkin Bread

One of my favorite things about fall is all of the pumpkins! I love seeing pumpkins everywhere, I love pumpkin candles, I love pumpkin spice lattes, and I love pumpkin bread. There's something just so homey and cozy about pumpkins. I light my pumpkin candles as soon as I get home every day and it instantly makes our house feel so warm and welcoming. I love it. It's the small things. :)


I first had this pumpkin bread a few years ago when one of Daniel's co-workers sent him home with a loaf. We both loved it and ate the whole thing in about two days. Maybe it was just one day. It was a long time ago...I can't remember. Don't judge. Anyway, he asked her for the recipe and I've been making it several times every fall since. Making this pumpkin bread even made it onto our fall bucket list. It's that good, y'all.

I made my first batch of the season this a couple of weekends ago and I cannot even tell you how good our house smelled. You will not be able to wait for this bread to come out of the oven! It has the just the right balance of pumpkin, cinnamon, and nutmeg and it is perfectly moist.

You've got to try this pumpkin bread this fall. You just might find yourself eating an entire loaf in one day, too. ;)

Perfect Pumpkin Bread
Makes 3 loaves
Printer Friendly Version

3-1/2 cups flour
2 tsp. baking soda
1-1/2 tsp. salt
1 heaping tsp. cinnamon
1 heaping tsp. nutmeg
3 cups sugar
1 cup oil
4 unbeaten eggs
2/3 cup water
1 can pure pumpkin (not the pumpkin pie mix)

  1. Mix all dry ingredients together in a large bowl.
  2. Add all remaining ingredients and mix until smooth.
  3. Grease three medium-sized loaf pans (8" x 4"). Pour the batter into the loaf pans as equally as possible.
  4. Bake at 350 for 1 hour or until the bread starts to pull away from the sides of the pan. Check with a toothpick to make sure it's done.
  5. Cool, slice, and enjoy!


post signature
Follow on Bloglovin  follow us in feedly

Monday, September 9, 2013

Jalapeno Popper Chicken Chili

One of my favorite things about fall is the food. I'm a fan of any kind of comfort food and fall seems to lend itself to so many of my favorites...two of which being soup and anything with pumpkin! I can hardly wait to make my first batch of pumpkin bread! But this post is about one of our new favorite soups.


I found this recipe last year {Pinterest, of course!} and made it several times throughout fall and winter. I've actually never even had a real jalapeno popper, but something about the recipe just made me want to make it! The flavors in this soup are just so warm and cozy. {Can flavors be cozy? I'm thinking yes.} The spiciness of the jalapeno peppers, the slight crunch of the corn, and the richness of the cream cheese are a delicious combination.


Jalapeno Popper Chicken Chili
Makes 6 servings
Printer Friendly Version

Olive oil
1 small onion, diced
4 jalapeno peppers, diced, seeds removed (leave the seeds if you want more heat)
3 cloves garlic, minced
Salt and pepper, to taste
1-1/4 lb. boneless chicken breasts, cut into bite-sized pieces
2 tsp. chili powder
1/2 tsp. ground cumin
1 tsp. dried oregano
1 (14 oz.) can petite diced tomatoes with juices
1-1/2 cups chicken broth (reduce or omit if you want a thicker soup)
1 (19 oz.) can cannellini beans
1 (14 oz.) can corn
8 ounces cream cheese
Toppings: shredded cheese, sour cream, green onions, tortilla chips (optional)

Directions:

  1. In a large, heavy-bottomed saucepan heat 2 tablespoons oil over medium heat and saute onion, jalapeno peppers, and garlic until soft and tender.
  2. Season the chicken well with salt and pepper. Add another tablespoon of oil to the pan (if needed) with the chicken and lightly brown chicken on all sides. Season with chili powder, cumin, and oregano.
  3. Add tomatoes, chicken broth, beans and corn. Bring to a simmer and cook 30 minutes. Taste and season as needed.
  4. Add cream cheese and stir until completely melted. Remove from heat.
  5. Add toppings to soup as desired. Enjoy!


post signature
Follow on Bloglovin  follow us in feedly

Friday, August 30, 2013

Pizza Bites {Football Food}

Only one more day until college football starts!!! Yay!! I am SO excited! I do love watching the game every week, but one of my favorite things about football season is having a reason to make fun appetizers and snacks. I shared the recipe for cheddar bacon dip last week which is of our favorites. It is so good! This week, I'm sharing another one of our favorites. Pizza bites!


These pizza bites are easy, cute, and most importantly, delicious! They also taste great at room temperature so you don't have to stress about keeping them warm. Just serve them with a side of your favorite marinara sauce and you have a great party snack. To make this recipe even easier, I always use pre-made pizza dough. I buy it in the bakery section at Publix. You could definitely make it with your own favorite pizza dough recipe, though.

Here's the recipe!

Pizza Bites
Makes about 20-24 bites
Printer Friendly Version

1 lb. pizza dough (enough for one whole pizza)
4 oz. mozzarella cheese (20-24 pieces)
Pepperoni

Topping:
olive oil
Italian seasoning
grated Parmesan cheese

Directions:

Preheat the oven to 400˚ F.  Lightly grease a 9-inch pie plate or cake pan.  Divide the pizza dough into 20-24 roughly equal sized pieces.  Take one of the dough pieces, top with a cube of cheese and a slice or two of pepperoni.  Pull the edges of the dough around the fillings and pinch closed.  Place seam-side down in the baking dish.  Repeat with the remaining dough pieces.

Lightly brush the tops of the dough balls with olive oil.  Sprinkle with Italian seasoning and grated Parmesan cheese.  Bake for 20 minutes, or until the tops are golden brown.  Serve warm, with dipping sauce as desired.

Source: Annie's Eats

Hope you love this one! Oh, and Roll Tide! :)

post signature
Follow on Bloglovin  follow us in feedly

Friday, August 23, 2013

Cheddar Bacon Dip {Football Food}

This dip couldn't be easier to make and it's the perfect snack for watching college football. Only 8 more days...I can't wait!! :) It only requires four ingredients and literally comes together in less than five minutes. My favorite kind of recipe!


All you'll need is sour cream, a packet of ranch dressing mix, cheddar cheese, and bacon bits. Make sure you get the real bacon bits, not the crunchy things that my students pile onto their lunch tray. {They literally eat them by the spoonful. Ew.}
These are the bacon bits you're looking for.
{Source}
I used a blend of cheddar and white cheddar.
Make this for your next football party. Your friends will thank you!

Cheddar Bacon Dip
Printer Friendly Version

16 oz. light sour cream
1 packet ranch dressing mix
3 oz. package of bacon bits
1 cup shredded cheddar cheese

Mix ingredients until well blended and refrigerate for 24 hours. Serve with tortilla chips.

Source: Plain Chicken

post signature
Follow on Bloglovin  follow us in feedly

Monday, August 5, 2013

Spicy Sausage Pasta {30 Minute Meal!}

As soon as I saw this spicy sausage pasta on Kevin & Amanda, I knew I had to try it. I'm not really even a big fan of smoked sausage {as in I never even bought it}, but her pictures were so fabulous that I put it on our menu right away.


The first time I made it, we both raved about how good it was after {almost} every single bite! There is just so much flavor in this meal. It's creamy, cheesy, a little spicy, and oh so yummy! And another win, it takes less than 30 minutes and only uses one pan! I love that I don't have to boil the pasta separately! So, even if you're not a fan of smoked sausage, give this one a try. It really is one of our very favorites!! :)


Spicy Sausage Pasta
Makes 4 servings
Printer Friendly Version

1 T. olive oil
1 (13 oz.) package turkey smoked sausage
1.5 cups diced onion
2 cloves garlic, minced
1-3/4 cups chicken broth
1/2 (10 oz.) can mild Ro-Tel tomatoes {If you want more heat, use the whole can!}
1/2 cup heavy cream
8 oz penne pasta
1/2 teaspoon salt and pepper, each
1 cup Monterey Jack cheese, shredded {I've used Cheddar Jack and Mexican Blend, too!}
1/3 cup green onions, sliced


  1. Add olive oil to a large, oven-safe skillet over medium high heat until very hot. Add sausage and onions and cook until lightly browned, about 4 minutes. Add garlic and cook until fragrant, about 30 seconds.
  2. Add broth, tomatoes, cream, pasta, salt and pepper and stir. Bring to a boil, cover skillet, and reduce heat to medium-low. Simmer until pasta is tender, about 15-20 minutes, stirring occasionally.
  3. Remove skillet from heat and stir in 1/2 cup cheese. Top with remaining cheese and sprinkle with scallions. Broil until cheese is melted and bubbly.
Barely adapted from Kevin & Amanda

post signature
Follow on Bloglovin  follow us in feedly

Linking up with Chef In Training and Anyonita Nibbles.

Thursday, July 11, 2013

The Best Lasagna + Why I Cried {Twice!} the First Time I Cooked for Daniel

The first meal I ever made for Daniel was lasagna. We had only been dating for a couple of weeks so I definitely had some pre-cooking jitters. I wanted it to be perfect. I planned an impressive menu: lasagna, garlic cheddar biscuits, Caesar salad, and a {frozen-you'll need to know that later} chocolate peanut butter dessert. When we first started dating, he came over every Monday night and we had dinner and watched The Bachelor together {don't tell him I told you that}. It was Jason and Melissa's Molly's season.

{Source}
I knew I wouldn't have time to assemble and bake the lasagna all on Monday night, so being the prepared person that I try to be, I assembled it on Sunday and just kept it in the fridge until I was ready to bake on Monday. So...Monday came, I got home from work, and I put the lasagna in the oven right away since it had to bake for an hour and a half or something ridiculous like that.


An hour and a half later, the cheese was melted, the lasagna was hot and bubbly, the biscuits were done, the salad was tossed, the dessert was in the freezer. I was ready! I was going to pull off this dinner without a hitch!

Finally, we were sitting at the table ready to eat and I took my first bite, anxiously awaiting the deliciousness of this lasagna that I had made several times before. My taste buds were assaulted by COLD lasagna. Yes, cold. Now, how something that has been hanging out in a 350 degree oven for 90 minutes can be cold in the middle, I'll never know. I know it had been in the refrigerator, but really? An hour and a half at 350 won't heat it up?

Well, I was mortified and asked Daniel if his was cold. He waffled around a bit telling me that it wasn't cold, but wasn't hot either {assuring me at the same time that he loved it}. I snatched his plate right out from in front of him and marched it over to the microwave in an attempt to get it to the appropriate piping hot temperature {I was crying, too. Yep.}. I got it to a hot temperature all right. When I returned his plate to him, it was so hot that he burned his mouth. Fail!

We got past the cold, then extremely hot lasagna and made it to dessert. As I mentioned, it was a frozen dessert. Of course, I wanted to get perfect slices of the dessert on the plate so all the yummy layers were displayed. And here's where the second round of tears came in. I couldn't even get my knife through the dessert! I'm not sure why I didn't just let it soften for a few minutes so it was easier to cut, but no. I distinctly remember standing at the counter fighting with the knife trying to get it to go through. All the while, Daniel is sitting at the table probably wondering how many other shades of crazy I had. Bless him, though. He saw past it. And I can happily say that I've chilled out since then. :)

Anyway, I'm sharing a recipe today not for that lasagna {I've never made it since}, but for our new favorite lasagna. If it were my own recipe, I would not be so bold as to declare it "the best," but this is Pioneer Woman's recipe. She can say something is the best, and I believe her.


Around Valentine's Day, we watched the episode of Pioneer Woman where she made this lasagna. We did homemade gifts for Valentine's Day this past year and my gift to Daniel was to make any meal he wanted - drinks, appetizer, entree, sides, dessert, everything. When we saw Pioneer Woman making this lasagna, his decision was made. I mean, what says love like layers of meat, cheese, and pasta?! Now, it's the only lasagna recipe I'll use. After all, I made it through this lasagna dinner without crying.

Hope you love it as much as we do!

The Best Lasagna
Makes 12 servings
Printer Friendly Version

1-1/2 lb. ground beef
1 lb. ground pork
2 cloves garlic, minced
1 (28 oz.) can whole tomatoes
2 (6 oz.) cans tomato paste
2 T. dried parsley
2 T. dried basil
1 tsp. salt
3 cups cottage cheese (If you hate cottage cheese, don't worry! You can't tell it's cottage cheese!)
2 eggs, beaten
1/2 cup grated Parmesan cheese (Kraft canister)
2 T. dried parsley
1 tsp. salt
1 lb. sliced mozzarella cheese
1 package lasagna noodles

  1. Bring a large pot of water to a boil. Add 1/2 tsp. salt and 1 T. olive oil to pasta water.
  2. Meanwhile, in a large skillet or saucepan, combine ground beef, ground pork, and garlic. Cook over medium-high heat until browned. Drain half the fat off. Add whole tomatoes, tomato paste, 2 tablespoons parsley, 2 tablespoons basil, and salt. Break up the whole tomatoes a bit. After adding the tomatoes, the sauce mixture should simmer for 45 minutes while you are working on the other steps. Stir occasionally and break up the tomatoes more each time. 
  3. Cook the lasagna noodles according to package directions. Be careful not to over boil. Lay out on a piece of foil or wax paper to prevent sticking. Set aside.
  4. In a medium bowl, mix cottage cheese, beaten eggs, grated Parmesan, 2 more tablespoons parsley, and 1 more teaspoon salt. Stir together until well combined. Set aside.

To assemble:
  1. Arrange 4 cooked lasagna noodles in the bottom of a baking pan, overlapping if necessary. Spoon half the cottage cheese mixture over the noodles. Spread evenly. Cover cottage cheese with a layer of sliced mozzarella cheese. Spoon half the meat/sauce mixture over the top.
  2. Repeat, ending with meat/sauce mixture. Sprinkle top generously with extra Parmesan.
  3. Either freeze, refrigerate for up to two days, or bake immediately: 350-degree oven for 30 minutes, or until top is hot and bubbly.
Recipe slightly adapted from Pioneer Woman


post signature
Follow on Bloglovin  follow us in feedly

Monday, July 8, 2013

Crock Pot Chicken Tacos {Only 3 ingredients!!}

Good Monday morning, everyone! I hope y'all had a great holiday weekend! It was rainy all weekend here so we saw a movie on Saturday afternoon, went to church on Sunday morning, and pretty much relaxed at home the rest of the time. Oh, and we made homemade ice cream this weekend and it was a fabulous success{and dangerously easy}! I can't wait to make another flavor! I plan on sharing the method we used soon! :)

But today, let me tell you, I've got a great recipe to share that has become an absolute staple in my meal planning. I found this recipe a little less than a year ago and have made it so many times since. I knew it would be a winner as soon as I saw it. I love tacos, I love easy recipes, and I love having food ready and waiting on me in the crock pot. I also love it because it's so easy I don't even have to pull out a recipe to make it! Oh, and did I mention that you only need three ingredients?


It's also a fairly budget friendly meal, especially if you can get everything on sale. It makes a large amount of chicken and we usually end up freezing half of it so we have dinner ready for another night. That's another thing I love about this recipe! I love having meals ready to go in the freezer! It really helps on those days we just don't feel like cooking!


Whenever I make a crock pot recipe, I always use these slow cooker liners. It makes clean up so much easier!


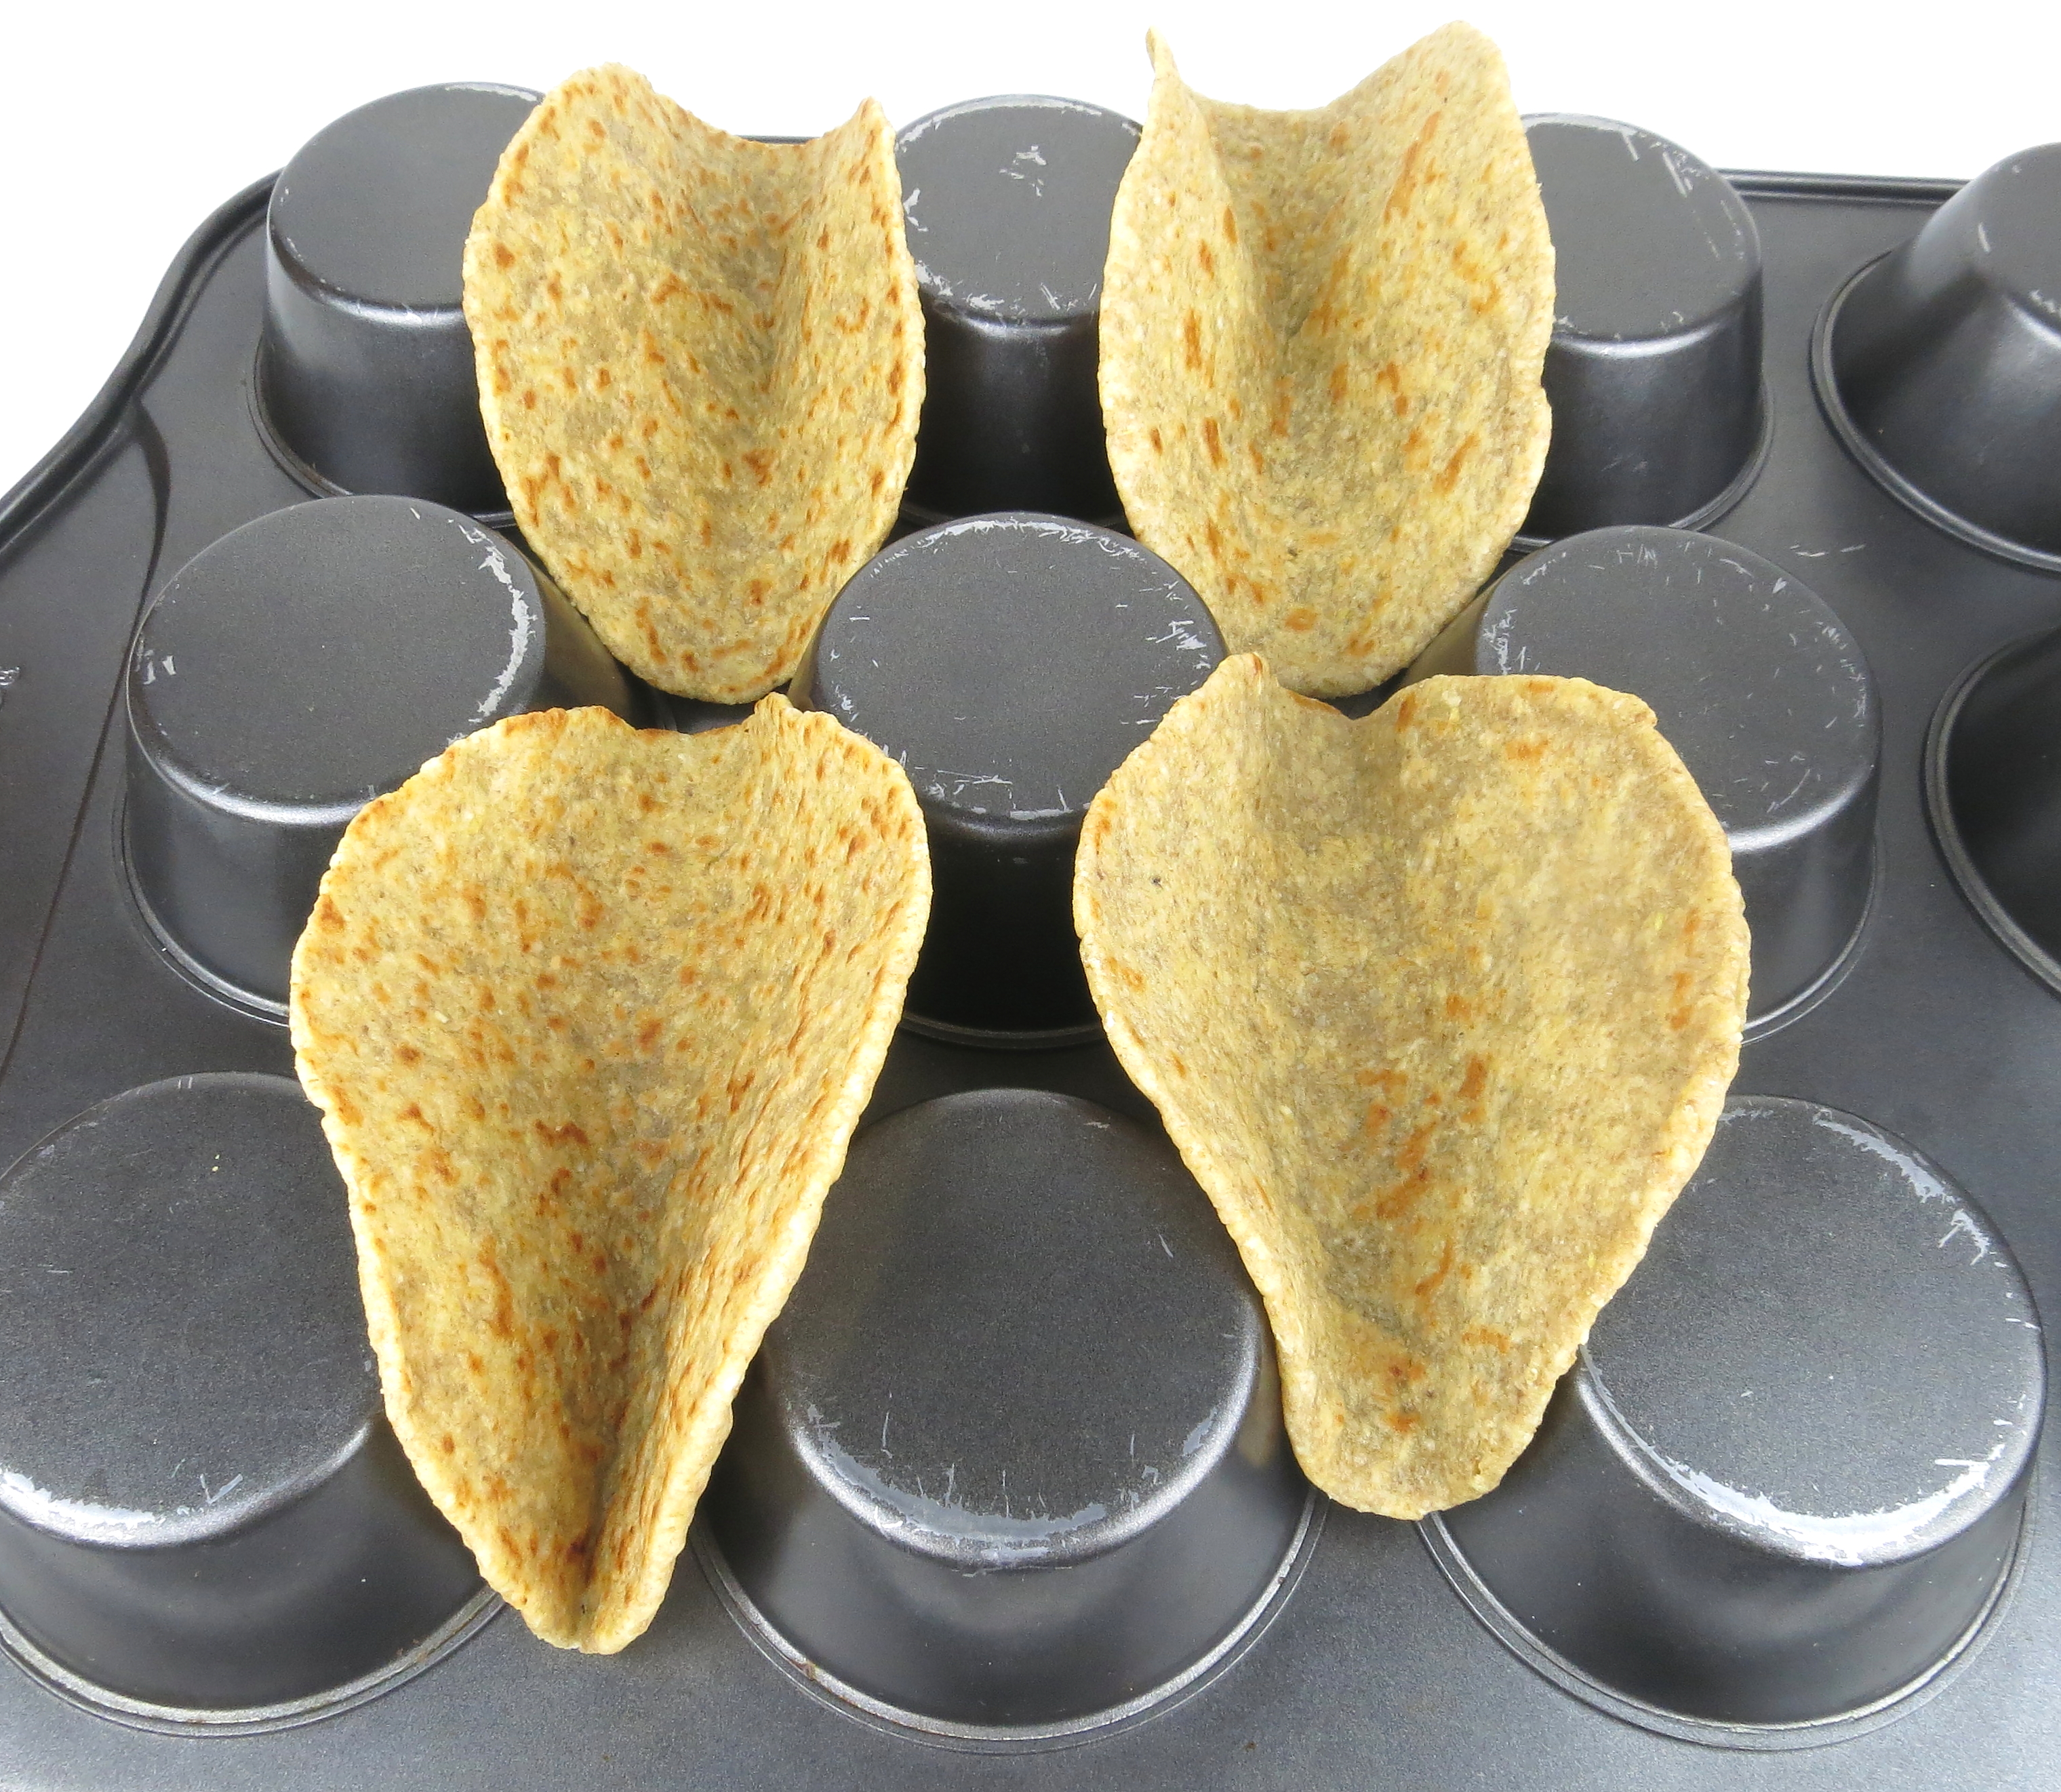
And here's a trick I love for filling the taco shells. It's so quick and easy, you can do several at a time, and then you can just slide the whole muffin tin in the oven when you heat them. Be careful, though. I've had tacos slide out and fall on the oven door before. :(

{Source}
These are our favorite taco shells. Usually, all 12 taco shells are unbroken {don't you hate when you get a box of taco shells and half of them are broken?!}, and they perfectly crisp and crunchy after they're warmed in the oven.


Okay, so have I sold you yet? :) You have to give this one a try. I know you'll love it!!

Crock Pot Chicken Tacos
Printer Friendly Version

1.5-2 pounds boneless skinless chicken breasts
1 packet of taco seasoning
1 (16 oz.) jar of your favorite salsa (My favorite is Tostitos Restaurant Style)


  1. Arrange the chicken breasts so they cover the bottom of the crock pot. Sprinkle them evenly with taco seasoning and then spoon the salsa over the chicken so that the taco seasoning is covered. Do not stir.
  2. Cook on low for 4-5 hours or on high for 2-3 hours.
  3. Shred the chicken using two forks and stir so everything is evenly incorporated. You may want to drain some, but not all, of the juices.
  4. Fill your tacos with chicken and top with cheese. Bake at 425 for 2-3 minutes to warm the taco shells and melt the cheese.
  5. Top with sour cream, salsa, guacamole, green onions, tomatoes, etc... Enjoy!
Source: Iowa Girl Eats

Let me know what you think of these!! Have a great Monday!

Linking up with Anyonita NibblesChef In Training, The Country Cook, Six Sisters' Stuff, and Lamberts Lately.

post signature
Follow on Bloglovin  follow us in feedly

Wednesday, June 19, 2013

Hibachi Style Fried Rice - 15 Minute Meal!

We went through a phase when we were dating and newly married where we went to a Japanese steakhouse almost every week. You know what I mean, the soup, salad, meat, veggies, fried rice, onion volcano, tossing spatulas. We were hooked (on the food, not so much to the onion volcano and spatula show). I don't know if it was the dating/newlywed fog of bliss that made us not think anything much of this habit, but we finally realized, "Okay, we are spending a little too much way too much money on this!" Our favorite thing was easily the fried rice and we were craving it one night like crazy. So, I googled it...and found a really great {and easy!} recipe that we have made tons of times since.

The key to this recipe is using leftover, cold rice. Sometimes I make rice just for this meal and put it in the fridge for a few hours or up to a couple of days, and other times I just make a triple batch if we're eating rice with another meal and put what's left in the fridge. Then, it's ready to go whenever we're ready to make this fried rice.

Oh, and let me tell you about one of my favorite kitchen gadgets. It's my rice cooker.
I bought it after I knew this recipe was a keeper and it makes it so much easier. You just add rice and water (I add a few drops of vegetable oil and about a teaspoon of salt to add a little flavor), turn it on, and you'll get perfect, fluffy rice every single time. I love my rice cooker because it doesn't take up much storage space and it was not very expensive at all! You can totally make this recipe without a rice cooker by just following the directions on the package of rice. It's just a lot easier for me to use the rice cooker because I'm guaranteed perfect rice and I don't have to babysit it at all!

Enough rice cooker love! Let's get to the recipe!

Hibachi Style Fried Rice
Makes 2 servings (Recipe can easily be doubled or tripled)
Printer Friendly Version

2 cups cooked, cold rice
1 T. olive oil
1/2 cup onion, diced
1/2 cup peas and carrots, frozen
1-2 cloves of garlic, minced
1 egg, optional (I usually leave this out and we like it just as well.)
2 T. butter
2 T. soy sauce (more or less to taste)
salt and pepper
  1. Saute onions, peas, and carrots in olive oil over medium high heat until soft. Add salt and pepper to taste. Add the minced garlic and saute until fragrant, about 30 seconds.
  2. Add the butter and cold rice and break apart the chunks of rice.* Add more salt and pepper to taste. Reduce the heat to medium and saute for about five minutes.
  3. Add soy sauce and saute for 1-2 minutes.
Variations: Make it chicken fried rice by dicing up a boneless, skinless chicken breast and sauteing it with a little soy sauce, salt, and pepper. Add the fully cooked chicken after you've sauteed the rice for a few minutes. You could also add a 1/2 cup of shredded cabbage with the onion, peas, and carrots. I don't usually have cabbage, but if I do, I add it and it's really good!

Recipe slightly adapted from Food.com

*I break up the rice with a plastic potato masher. I used to do it with just a metal serving spoon and rice would fly everywhere if I hit it at the wrong angle. Not good. My husband had a stroke of genius one day and suggested using our potato masher. It worked perfectly! No more flying rice!


So, not only have we saved a ton of money by making this rice at home, I've also saved myself the embarrassment of being hit in the face with a chunk of chicken or zucchini when they try to make you catch it in your mouth. {Daniel always gets it. I never catch it. NEVER!}

Let me know if you try this one! :)


I'm linking up with Lamberts Lately and The Country Cook!

UA-41563965-1